Tuesday, January 31, 2012

First Swap

Today I am posting photos of card fronts that I have made for my first swap. I thought this would be a good first try as anything goes as long as it is Stampin' Up! Product and 4 1/4 X 5 1/2 in dimensions.


 I am only including a few of them and as you see some of them look familiar, with maybe some slight changes. In the next few weeks I will give the project recipes for these card fronts and include the ones I do not have finished or photographed yet.

I hope you enjoy!
DanicaA


Monday, January 30, 2012

Before Stampin' Up! Cards

Today I thought I would post some photos of card I had made previously to joining Stampin' Up! as a Demo. Now days I try to use exclusively SU products, I have quite a few non-SU items I still need to either use up or clear out but haven't really gotten to that stage yet. Although I haven't used any of them for the last few months, so we will see.

I created a couple of collages of my card pictures as I feel this will look better than multiple single shots. I have been learning to use Photoshop Elements and I love being able to do things like this with my photos.

Some of my favorite papers prior to using SU, were by Die Cuts With A View. You will see quite a few of their papers here as I have pile of 12x12 pads about 2-1/2 - 3' high.


Let me know which card  is your favorite. My favorites are most of the cards in the top collage.

I hope you all enjoy! 
DanicaA

Sunday, January 29, 2012

Multiple Challenge Card


I made this card today with the hopes of making it a multiple challenge card & I think I actually succeeded. I have never done any of the challenges I have seen on other blogs but thought this would be a great way to stretch my boundaries and extend my abilities. I started out unsure of what I was doing but in the end came out with a card that I really like. This is also not my usual style, I tend more to the simple & elegant, where as this is a little more gussied than I normally would do.

I started out by viewing this card by Lesley of Always Playing With Paper Blog. She did three different challenges with this one card. So, I decided to give it a try. 


The challenges are as follows:
Color Throwdown #176  this is where I got my color choices.


January 2012 SFYTT this is where the basic layout came from (the sketch).

jan2012sketch

PLG #16......Flutter By Butterfly I got some of my inspiration from this picture. I felt the colors from the above color challenge worked perfectly with this photo and Butterflies are always fun to incorporate.


Leave a message and let me know how you think I did.

I hope you all enjoy!
DanicaA


Project Recipe: Crumb Cake, Chocolate Chip, Rose Red, Pool Party Card Stock, Mocha Morning Designer Series Paper, Victoria 5/8" Crochet Trim, Chocolate Chip Quilted Satin Ribbon, Pool Party Bakers Twine, Pool Party, Rose Red, & Chocolate Chip Classic Stamp Pads & Stampin' Write Markers, Mixed Bunch, Punch Potpourri, Valentine Love Stamp Sets, Big Shot, Perfect Details & Backgrounds 1 Texturz Plates, Fancy Fans Letterpress Plate, Hearts Collection Framelits,  Scallop Trim Border Punch, Blossom Punch, Butterfly, Corner Rounder Punch, Vanilla Scented Embossing Powder, Basic & Large Pearls

Saturday, January 28, 2012

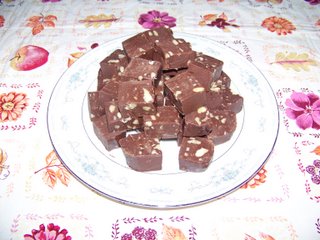
Vegan Fudge


1-10 oz. container Suzanne’s Ricemellow*
1-1/2 c sugar
2/3 c soy milk
1/4 c soy butter*
1/4 t salt
2 bags 12 oz. Guittard Semi –sweet chocolate chips
1 c chopped walnuts
1 t vanilla


In a large saucepan, combine Ricemellow Crème, sugar, milk, butter and salt.
Bring to a full rolling boil over medium heat, stirring constantly, Boil 5 minutes
Then remove from heat. Add chocolate chips and stir until chips are melted
And mixture is smooth. Add walnuts and vanilla, and mix well. Spray a 9” square baking dish with non-stick cooking spray. Pour fudge into prepared pan
And chill until firm. Cut in desired size squares.

Our you UPS driver really enjoys this fudge. Quite often when he makes a delivery or if I happen to see him elsewhere, he asks if I have made fudge lately. Needless to say I make sure to set aside a few pieces for his next delivery.


*These items can also be purchased at your local health food stores.

I hope you all enjoy!
DanicaA

Friday, January 27, 2012

Free 30 day Trial......


of Stampin' Up!'s Digital design program My Digital Studio (MDS) download available February 1st.

This is a great opportunity to try this product. If you are a digital scrapbooker, with this program you would have access to Stampin' Up!s exclusive artwork. You can also do hybrid card making, scrapbooking, calendars, etc.. I love this option as I do like working with the Stampin' Up! products, but I also like the idea of being able to add my own text or that perfect saying with out having to worry if I have a stamp set that will convey my message. I can type it in MDS, or I can do a layout in MDS with photos & text and then print to the card stock and continue layering and embellishing with non-digital products. 


With the FREE trial, you'll get:

It's simple; add the free My Digital Studio Express trial (#129600) to your online shopping cart, & then download.

You can download it from my online store.


Watch for more information on February 1.


I hope you all enjoy!

DanicaA

Wednesday, January 25, 2012

Butterfly Thank You


I started this card out by choosing my colors. I wanted something a little different from what I tend to gravitate towards. I used Pear Pizzazz, Rich Razzleberry & Crumb Cake as my main colors and added some glossy white card stock for the butterfly and Mocha Morning DSP. I ran the Pear Pizzazz through the Big Shot with the Fancy Fans Letterpress plate. I used the Flight of the Butterfly stamp set for my images. The butterfly was stamped on glossy card stock with Versamark ink & then embossed with the vanilla embossing powder. I then sponged over the butterfly with Rich Razzleberry & Pear Pizzazz ink. This is the same technique you can view in this Video by Frenchie from frenchiestamps

I used the butterfly punch which coordinates with the stamp set to punch out the butterfly.

I hope you all enjoy!
DanicaA

Project Recipe: Pear Pizzazz, Rich Razzleberry, Crumb Cake, & Glossy White Card Stock, Mocha Morning Designer Series Paper, Fancy Fans Letterpress Plate, Big Shot, Flight of the Butterfly Stamp Set, Butterfly Punch, Vanilla Scented Embossing Powder, Heat Gun, Embossing Buddy

Tuesday, January 24, 2012

Sale-A-Bration Begins Today!!!!

Yeah! This means free product. With every $50 Purchase not including S&H &Tax you receive a free product of your choice from the Sale-A-Bration (SAB) catalog. 

There are quite a few products to choose from, some are from the main catalog & some of your choices are exclusive to this catalog for this year, they will not be available again.
The Everyday Enchantment Designer Series Paper (Pg 7, 126154) has some gorgeous papers in it, there is a matching Ribbon & Brad pack(Pg 7, 127279), what cute brads.

Images© Stampin' Up!

Images© Stampin' Up!


New Stamp Sets 

Images© Stampin' Up!


My Digital Studio CD's

Images© Stampin' Up!

Hostess Benefits

Images© Stampin' Up!

Join Stampin' Up! during SAB for extra benefits for the rest of the year!

Images© Stampin' Up!

Images© Stampin' Up!

Images© Stampin' Up!


To shop visit my Stampin' Up! Website. Remember you also receive hostess benefits for order of $150 & above, along with the SAB freebies. This means for an order of $150 you would receive  3 free items from the SAB catalog, $25 in free product from the main catalog (IB&C) & a free Stampin' Up! tote* (pictured above with the hostess benefits). And a $400 dollar order will get you the SAB Bundle of DSP, Brads & Ribbon, & stamp set all pictures above for free in addition to SAB products, $65 in free product from the IB&C, the free tote* & 1 full priced item at 50% off.

To join contact me or visit my website, no password needed.


I hope you all enjoy!
DanicaA


*Free shopping tote with workshop, customer and demonstrator orders only; offer does not include online orders. Free hostess bundle with workshop, customer, or demonstrator orders; offer does not include online orders. Offers are not incremental (i.e., a hostess does not receive two totes for a $300 workshop or two bundles for an $800 workshop).


Monday, January 23, 2012

Love Letterpressed


I have to say that I really like this card. I used the other half of yesterdays paper doily and mounted on whisper white card stock. I then took my Lots of Love Letterpress Plate & sprayed it with the Blushing Bride Smooch Spritz. I like how the shimmer brings out the letters.


This card will be a definite pick for craft camp or a workshop. It also works great for my Big Shot club as it uses a lot of Big Shot dies.

I hope you all enjoy!
DanicaA


Project Recipe: Cherry Cobbler, Basic Black, Riding Hood Red, Basic Grey, Whisper White Card Stock, Lots of Love Letterpress Plate, Paper Doily Large Sizzlit, Big Shot, Blushing bride Smooch Spritz, Mixed Bunch Stamp Set, Blossom Punch, Heart Punch, 3/8" Riding Hood Red Satin Pleated Ribbon, Basic Grey Glimmer Brad

Sunday, January 22, 2012

Dare To Dream


I have been working on a second project for a valentine's day craft camp & had the idea to layer the paper doily. I wasn't sure how well this would work, but I had to give it a try & I have to say that I definitely like the results. I layered the doilies after cutting the sections down for each layer and then cut the doily in half creating two halves, one of which I used on this card and another on the card I will be demoing at craft camp. I will post that card tomorrow.

I used the Heart Pressed Letterpress on the Basic Grey without adding any ink as I wanted to just have the image embossed into the paper. You can see this in the picture below. I am really like the pleated ribbon although I have found that when I wrap the ribbon to hide edges it does add a little too much weight. To fix this I cut the ribbon thread and opened the pleat at each end and then wrapped, this makes the card front lay down flatter.


To finish I used the Mixed Bunch Stamp Set & Blossom Punch to create a butterfly, which I added a glimmer brad and attached to the card. I wanted to use a saying that is a little more Valentine's dayish but as I do not have a huge supply of current stamp sets yet that have to do with love, anniversaries, weddings or valentines day I made do with what I have and ordered the Valentine Love stamp set. I should be getting my order this week on Tuesday or Wednesday. Just in time to get my make-n-takes ready for craft camp this weekend.

Hope you all enjoy!
DanicaA


Project Recipe: Cherry Cobbler, Riding Hood Red, Basic Grey, Basic Black, Whisper White Card Stock, Riding Hood Red Classic Ink, Loving Thoughts & Mixed Bunch Stamp Sets, Paper Doily Large Sizzlits Die, Heart Pressed Letterpress Plate, Big Shot, 3/8" Riding Hood Red Pleated Satin Ribbon, Blossom Punch, Basic Grey Glimmer Brad, Dimensionals


Saturday, January 21, 2012

Re-purposed my file drawer.....

at the beginning of the year. I have a four drawer file cabinet and was not really using part of it. Plus I don't really like the way the drawers pull out, so I decided to see if I could use a couple of drawers for something other than files. As you can see below I have moved my printer papers & envelopes to the drawers.

I have four mesh paper holders that I had previously been using in a bookshelf. I really like this much better, I do not need to be in here all that often and I definitely needed the bookshelf space. 


Starting from left to right I have regular printer paper, 3-Hole punched printer paper; cheap card stock, Avery Labels & Business cards; resume paper, decorative printer paper, photo paper, large white catalog envelopes and two different sizes manila envelopes. I also have envelope moistener (I absolutely hate licking the envelops) & two other smaller sized envelopes tucked in the side (you can see them better in the top photo.) 

My printer sits right above this drawer so this is very convenient for me. 

I hope you all enjoy!
DanicaA


Thursday, January 19, 2012

Apple Streusel Cake

.

Streusel
1 c Brown Sugar
1 c Chopped Apples (I used about 1 1/2)
1 c Sliced or Chopped Nuts (I used walnuts)
1/4 c All Purpose Flour or Spelt Flour, or you could also use a Pastry Flour
1t Ground Cinnamon
3 T Earth Balance Soy Butter *


Cake
2 c All Purpose Flour
1 t Baking Powder
1 t Baking Soda
1/2 c Earth Balance Soy Garden *
1/2 c Sugar
6 T Water or Soymilk
1 t Vanilla Extract
1/3 c Orange Juice

Glaze
1/2 c Confectioners' Sugar (powdered)
2 1/2 t Orange Juice

Preheat Oven to 350°F. Spray tube pan well with Pam.
In a medium bowl mix together the streusel ingredients, set aside. 
In a separate bowl mix together the dry ingredients for the cake, again set aside.
 In a large bowl cream together soy butter & sugar, until fluffy.
 Add the egg replacer & water, beating well. 
Add vanilla.
Set mixer to low & alternately beat in the flour mixture & orange juice, starting & ending with the dry ingredients.
Spoon half of the batter into the pan & sprinkle with half of the streusel. Spoon remaining batter over the streusel, spreading to make an even layer. Swirl  with a kmife to make a marble pattern. 
Bake for 15 minutes. Remove cake from oven; sprinkle top with remaining streusel & return to oven. Bake until toothpick comes out clean, about 30-35 minutes. 
Transfer to a rack; cool completely.
Combine confectioners' sugar & orange juice to make glaze. Mix well
Turn cake out onto serving plate, streusel side up and drizzle glaze over the top. 
Serve & Enjoy.

My family has decided that they like this streusel cake better than the Almond Orange streusel cake. I still like the Almond Orange best , which is saying a lot on my part as apple pie-dutch crumb & apple cake are two of my favorite desserts. Usually for my birthday I request a dutch crumb apple pie.

*These items can also be purchased at your local health food stores.

I hope you all enjoy!
DanicaA


Wednesday, January 18, 2012

Happiness....Forever & Always


Here is my card as promised. I really like how it turned out although I will make a couple of changes when we do the Make-N-Takes at camp. 
  1. Change smaller pearls, at this time I only have the Jumbo Pearls and these are just to large for the size of card which is 5 1/4 X 4 1/4
  2. Change the size to 5 1/2 X4 1/4, I accidentally measured wrong when making my cuts.
  3. Change the Punched border, I think the pinking hearts or the scallop trim will look better
  4. I may also change the sayings, but these work for now.


I hope you all enjoy!
DanicaA

Project Recipe: Chocolate Chip, Very Vanilla, Rose Red, & Blushing Bride Card Stock, Chocolate Chip & Rose Red Classic Ink, En Francais Background Stamp, Loving Thoughts, Fresh Vintage (SAB) & Curly Cute Stamp Sets, Big Shot,  Backgrounds 1 Swirls & Diamonds Texturz Plates, Fashionable Hearts Embosslit, Hearts Collection Framelits, Scoreboard, Large Pearls, Dimensionals 


Tuesday, January 17, 2012

Work, Work, & More Work

Okay.... it is getting late and I have to be up early tomorrow, not that I wasn't up early today. It is just that today I didn't have to be up early. It makes a big difference having to and just doing because. I thought today was going to be a shorter work day and I ended up working & doing errands for longer than expected. So not much accomplished on the Stampin' Up! side, but I am working on getting a PartyLite order together, that is a plus.

I did make a card tonight just finished and will take photos tomorrow and post with details. But I thought I would give you a hint by pointing you to the blog of Wendybell of Wickedly Wonderful Creations. If you click on the link it will take you directly to her blog and the particular card that I CASE'd this evening. I love the look of this card it is gorgeous, I think also that mine turned out well. I am planning on doing this as a demo card for Cindy's Craft Camp this month, although I will be making a few changes to mine before then. So make sure you come back tomorrow to see my version.

Hope you enjoy!
DanicaA

Monday, January 16, 2012

Whiskeytown Lake

This is the view from the highway of Whiskeytown Lake, CA. My family was on our way home from visiting grandparents, aunts, uncles, & cousins over the holidays. I took this photo from a moving vehicle with my iPod. The photo quality isn't that great but the view is still gorgeous. 

I haven't got around to making any new projects lately, but I am hoping that tomorrow I can get something  done other than work.....Making cards is NOT work, it is to much fun to be considered work, even if it is for my stampin' business.

I hope you all enjoy the view!
DanicaA

Sunday, January 15, 2012

Happy Birthday


This week was my youngest brothers birthday and as I have been very busy with work and then having caught the bug that has been going around, I needed a quick, simple & manly card. This card fits the bill to a tee. I believe that it took longer to choose the colors than it did to make it.


I chose More Mustard, Lucky Limeade & Island Indigo with a whisper white base. Not your usual colors but they do work well with each other. By using the postage square punch, I was able to let more of the under layers show through. I also chose the Pretty Postage Stamp set as the Happy birthday image is a perfect fit for the occasion and the squares. To finish I added a few glimmer brads & a label for an added sentiment, from the Happiest Birthday Wishes Hostess Set. Inside I used a quote from the Hostess set Occasional Quotes (retired). 

This card was simple & easy. 
I hope you all enjoy!
Danica A

Project Recipe: Whisper White, More Mustard, Lucky Limeade & Island Indigo Card Stock, Pretty Postage, Occasional Quotes & Happiest Birthday Wishes Stamp Sets, Basic Black Classic Stamp pad, Postage Stamp Punch, Glimmer Brads

Friday, January 13, 2012

Paper Doily Wreath


This Doily wreath was made using paper doilies purchased at the local dollar store. I got the idea from the most recent Better Homes & Garden Scrapbook etc. Magazine. It is a little funny because they were demonstrating how you could use small doilies to make flowers to accessorize your scrapbook page.So I thought I would give it a try as I had some doilies (purchased a couple of years ago). The directions they gave called for five doilies, fold in half and then fold over slightly more than half.


So I got out my doilies and started to fold, my doilies are obviously quite a bit bigger. I knew they were larger than what was used in the article but thought it couldn't be to far off. Well.....I was wrong I ended up needing eight doilies folded in order to make it meet up nicely. I think I may have put them together a little differently, a little closer which I like as it gives it a fuller look. I attached a ninth doily, unfolded to the back side  & inserted a brad from the Stampin' Up! Antique Brad Collection.


I am unsure as to what I will do with this, for know it is hanging on the wall. It doesn't look to bad except for the fact that my wall is a cream color so it kind of blends to much. I did have one idea for it, use them at weddings instead of all the fabric bows have a few of these in either colors to match the wedding or make them white and spritz with Smooch Spritz in coordinating colors.

I hope you all enjoy!
DanicaA

Project Recipe: Eight paper doilies, Antique Brad

Thursday, January 12, 2012

Simple Doily Heart


This simple card came together as another test card. I am working on what to do as a valentine card at the next craft camp and really want to use the Paper Doily Sizzlits die & the Framelits Fashinable Hearts Collection. This time for the doily I used the Twitterpated DSP over Real Red CS that I used the Blushing Bride Smooch Spritz on to add sparkle.I ran the DSP & CS through the Big Shot with a Fashionable Heart Framelit and the glued to a square of Whisper White CS. To finish I added some Pleated Satin Ribbon and attached to a small card made from Blushing Bride Textured CS.

I hope you all enjoy!
DanicaA
Project Recipe: Blushing Bride, Whisper White, Real Red Card Stock, Twitterpated Designer Series Paper, Blushing Bride Pleated Satin Ribbon, Bigshot, Paper Doily Sizzlits Die, Framelits Fashionable Hearts, Blushing Bride Smooch Spritz

Wednesday, January 11, 2012

Fresh Olive Salsa

2 6 oz. cans ripe olives, diced
1 6 oz. can diced green chilies
4 large tomatoes chopped
4 to 5 chopped green onions
3 T olive oil
1 ½ t garlic salt
3 T white wine, red wine or rice vinegar

Combine first four ingredients in bowl. Mix the oil, garlic salt and white wine vinegar separately, then add to bowl. Chill 3 hours and serve with chips.


This salsa is an absolute favorite with my family. Any occasion whether special or not is an occasion to have this on the table, although sometimes it doesn't quite make it off the counter. You can also serve this on rice, it is especially good on wild rice that is browned with almond slivers before cooked. Use it to create an extra special salad or as a pasta toss. If you are out of tomatoes or only have 1 or 2 you can also substitute a can of diced tomatoes without messing up the recipe, or just cut the amount of olives to 1 can, the chilies to 4 oz. & the vinegar to 1 1/2 T. 

Hope you enjoy!
Danica

Tuesday, January 10, 2012

Big Shot Club

Here is the promised info regarding my Big Shot Club.
This club is running this month, January, February & March. Any longer and we will not be able to off the additional 3 free items. Each months payments are due by the 26th. I take cash, local check, money orders, certified checks & Paypal.


I look forward to helping you expand your supplies & skills.

DanicaA


Monday, January 9, 2012

Double Heart Card


This card was made using items that I had been experimenting with and leftovers. The Back die cut is the leftover paper after using the Paper Doily Sizzlits Die. The hearts were made using the Framelits heart collection two different sizes and the Paper Doily Die. I cut out the Paper Doily first on my Big Shot and then place both my doily and my solid card stock in Big Shot with my Heart Framelit after which I glued the heart doily & solid heart together. 


On the smaller doily I used Crystal Effects to cover, this changed the colors slightly and made the heart nice and glossy. I used the 5/8" organza ribbon and the 1/4" grosgrain ribbon gluing the 1/4" to the center of the organza ribbon and then gluing to my cut-out. I then glued the cut out to the card and glued the hearts in the center to create a simple but lovely valentine. 

I hope you all enjoy!
DanicaA


Project Recipe: Whisper White & Real Red Card Stock, Patterns Designer Series Paper Stack Brights Collection-Real Red, Big Shot, Paper Doily Large Sizzlits Die, Framelits Heart Collection, 5/8" Whisper White Organza Ribbon, 1/4" Real Red Grosgrain Ribbon, Crystal Effects

Sunday, January 8, 2012

Bigshot Club & New Website

Today I have been working on putting together a big shot club, I haven't quite finished the flyers but once I do I will upload them for you all. 

I have also spent hours today trying to get a permanent website up, with a new blog and other links. I am not having much success. I either am doing something wrong, missing something or the site software is not as easy as they say.....hmmm. We will see.

I hope you all had a great day & I will try to make sure I have a project for tomorrow.
DanicaA

Saturday, January 7, 2012

Patchwork Heart Card

Twitterpated Designer Series Paper, a Square of Card Stock & the New Stampin' Up! Framelits Heart Collection are used to create this lovely Patchwork Heart Card.

I started by cutting a Square piece of CS slightly larger than the largest Framelit heart, I then cut my DSP to varying width & lengths and glued to the CS (although if you cut them all the same length  as your square and then angle your heart die you will have the same effect without as much waste and this will make it easier. Oh! Boy, I should have thought of that sooner!) I then used the Framelits Heart with the Scallop edge to cut my heart with the Bigshot. I cut four pieces of DSP into triangles and glued them together onto another square of CS. I wrapped the Real Red Pleated Satin Ribbon around the edges gluing with the sticky strip as I wanted the ribbon to stay put. I then glued the patchwork heart to the front and used a smaller framelits heart  to cut another heart which I sprayed with Blushing Bride Smooch Spritz Stamped with the forever & Always stamp from the Loving thoughts stamp set and embossed with vanilla embossing powder. I then used a glimmer brad to accent and attached with a dimensional.

I like the results although I do feel that it could be a little less busy. I will probably make another one trying out the method above for my strips and instead of wrapping the ribbon around the whole card just I will try it just around the heart itself. We will see what results I get.

Hope you all enjoy!
DanicaA

Project Recipe: Whisper White Card Stock, Twitterpated Designer Series Paper, Loving Thoughts Stamp Set Basic Black Classic Ink, Framelits Heart Collection, Bigshot, Real Red Pleated Satin Ribbon, Blushing Bride Smooch Spritz, Vanilla Scented Embossing Powder, Heat Gun, Glimmer Brad

Friday, January 6, 2012

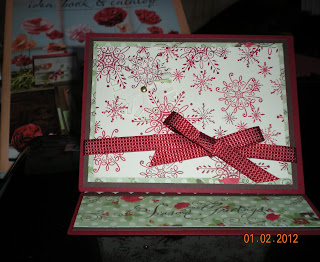
2011 Holiday Card

This year was the first year I made our Holiday cards.

For our Holiday card this year I went with an easel card. My mom loves this style...she doesn't like the way that most traditional cards fall over when you stand them up. This card stands up on its own a lot better than most.


Again I am using my favorite stamp set Serene Snowflakes. I stamped a full size sheet and cut down to size, by using a 12X12 piece of cardstock I was able to get 6 front pieces out of each piece of CS & 4 out of an 8 1/2X11 sheet. I also used the many Merry messages stamp set for my Season's Greetings & inside stamped message. I varied the inside message using different stamps from the same set.


I made about 40+ of these cards and so I wasn't feeling like I was an assembly line worker I varied things a bit. By using a single pack of DSP I was able to have a about 4-5 options paper wise. I kept the cardstock the same through out and varied the snowflake placement, Sometimes on the left hand as seen above and sometimes on the right with the ribbon on the left side tied in a knot instead of a bow. Also by flipping the punched out snowflake over I was able to use the Simple Snowflake matching stamp to have a different look. I also changed the brad on some to Rhinestones.


This year holiday cards are going to be much easier to make. Although the Simply Scored Tool came in handy with all the folds on this card.


I hope you all enjoy!
DanicaA

Serene Snowflakes - by Stampin' Up!
Serene Snowflakes 115438

Many Merry Messages Stamp Set - by Stampin' Up!
Many Merry Messages 116586


Project Recipe: Cherry Cobbler, Chocolate Chip & Very Vanilla CS, Holly Berry Bouquet DSP, Serene Snowflakes & Many Merry Messages Stamp Sets, Scallop Edge Border Punch, Snowflake Punch, Real Red, Cherry Cobbler & Basic Black Classic Ink Pads, Simply Scored Scoring Tool, Cherry Cobbler 3/8" Quilted Satin Ribbon, Gold Brads or Basic Rhinestones

Thursday, January 5, 2012

Cindy's November Craft Camp Project 3

To & From Stockings with Pocket


These were a favorite of the class. Not a lot of stamping is done with this project, but you can definitely  have fun fancying them up.

I used Designer Series Paper & Cardstock to give them weight as the DSP alone makes them a bit flimsy. The Baker's Twine gives a nice touch and although you can't see it very well in most of the pictures in the one below to the right top you can see a little of the quilted ribbon folded in half that we glued at the edge between the CS & DSP to give the finish touch to our stocking.
By adding a piece of cardstock to the back, glued just at the edges you have a pocket that you can place a gift card in and give as a gift.


I hope you all enjoy.
DanicaA

Project Recipe: Frostwood Lodge DSP, Cherry Cobbler & Garden Green Cardstock, Early Espresso 3/8" Quilted Satin Ribbon, Early Espresso Baker's Twine, Dear Santa Stamp Set, Holiday Stocking Bigz L Die, Snow Burst Textured Impressions Embossing Folders, Bigshot, Basic Black Classic Ink Pad, Scallop Edge Border Punch