Valentines is coming soon and today we started decorating at work, so I think a valentines card will be perfect for today. I am going to a craft camp this Sunday and this is the project I will be demonstrating this weekend.
Showing posts with label Stampin' Up. Show all posts
Thursday, January 30, 2014
Sunday, January 19, 2014
Octagon Boxes
I do have all the pieces cut and sponged and the flower topper made for a few more of which two are in color, one is Pistachio Pudding and the other is Strawberry Slush, once I get them finished I will photograph them and share, I ran out of the liquid adhesive & have been busy with work, holidays & life in general lately so haven’t gotten back to them since I got my adhesive order in.
Enjoy!
DanicaA
Project Supplies
Card Stock: Basic Black, Baked Brown Sugar
DSP: Modern Medley
Inks: Baked Brown Sugar, Early Espresso,
Big Shot & Dies: Mini Milk Carton Bigz L, Scallop Circle Bigz, Circle Framelit
Punches: 2 3/8”, 1 ¾”, & 7/8” Scallop Circle
Accessories: Large Pearl, Sponge Daubers, Sticky Strip, Tombow Liquid Adhesive, Scissors, Small Paintbrush
Sunday, January 12, 2014
August Craft Class
Going all the way back to August, I had my craft class and while I had a lot of fun and I want to think that my attendees had fun also, my turn out wasn't what I was hoping for. I wanted some new customers and while I did end up with one person who normally doesn't craft, she is more the type to have me create the project and she will buy it from me. I did end up with one person signed up for paper pumpkin, she did it for her daughter and has continued since then. I am going to see if she will give me some input on how her daughter likes the kits if she has been putting them together.
Here are the projects we created:
I hope you enjoy!
DanicaA
Project Supplies:
Joy Banner:
Banner Kit (Holiday Catalog, no longer available)
Stamp Set: Festive Flurry
Inks: Old Olive & Cherry Cobbler Ink Refills, Metallic Gold Encore Pad
Cardstock: Old Olive & Whisper White Cardstock
DSP & Specialty Paper: Season of Style (Holiday Catalog, no longer available)
Big Shot & Dies: Rosette Bigz XL Die & Festive Flurry Framelits
Punches: 2 1/2" circle (to create a back for the rosettes to hang from)
Accessories: Old Olive Ribbon, Gold Glitter, Frosted Finishes Embellishments
Misc Tools: Sponge Dauber, Spritzer Bottle, Hot Glue Gun, 90% Rubbing Alcohol
Merry Card:
Stamp Set: Joyful Christmas
Inks: Gold Metallic Encore Stamp Pad, Versamark
Cardstock: Cherry Cobbler Textured, Shimmery White
DSP & Specialty Paper: Gold Foil Sheets
Big Shot & Dies: Pretty Prints Textured Impressions Embossing Folder, Expressions Thinlits
Accessories: Gold Embossing Powder, Gold Glitter, Heat & Stick Powder, Frosted Finishes Embellishments
Misc Tools: Heat Tool, Dimensionals, Small Scissors
Monday, April 29, 2013
Bloomin' Bouquet
To order visit my store and enter in Item # 134542.
It is $12.95 for the kit and only available while supplies last.
Enjoy!!
DanicaA
DanicaA
Wednesday, April 24, 2013
Retired Stamps & Accessories
Friday, April 12, 2013
New Wood Mount Storage Boxes
I think I'm in love....I am going to be reorganizing some things and I may even have to purchase some wood mounts because these storage boxes are perfect and they even fit in with my storage solution for my current all clear storage a DVD Bookcase.
I hope you enjoy, I know I did!!!
DanicaA
Thursday, April 11, 2013
Monday, March 18, 2013
Smash Book/Scrap Album
I have been working on an idea I got a while back and am finally taking the time to start the creative process, I had ordered the Designer Series Paper already and just needed to get working. I am still in the process of creating each page but thought that I would share with you what I have so far and give you a glimpse into my space when I am working on a project. Although I have to say i got a little messier than usual with this one.
For the cover I used chipboard and card stock to create the back and front of my album and added Jump rings and ribbon to hold it together. The inside is card stock in the colors that coordinate with my chosen Designer Series Paper Fan Fair #126918.
Over the next few weeks I will share with you the pages as I create them.
I hope you all enjoy!
DanicaA
Sunday, March 10, 2013
Stampin' Success Sample
To get a sample of the Stampin' Up! Demonstrator bimonthly magazine click the link below. This is one of the great perks of being a Demonstrator, to learn more or to join my team contact me.
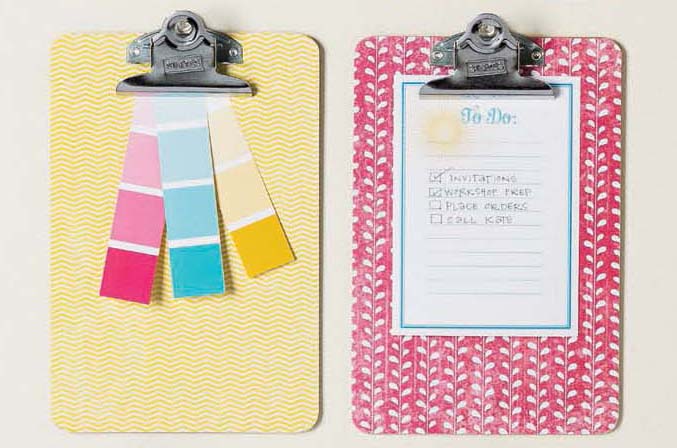
I just love the clip board idea in this issue. They are gorgeous!!!
I hope you all enjoy!
DanicaA
Friday, March 8, 2013
Sympathy Cards
I recently had a friend call and request an order of a dozen sympathy cards in no particular colors or designs just as long as they were blank-no inside sayings. ![]() |
I am not very good at sympathy cards as I have not had to many reasons to make sympathy cards since becoming a demonstrator. I was definitely a little worried although, not needing to put any sayings on the cards goes a long way towards helping as I only have one sympathy set. It took me about half a day to make these cards as I was a bit stumped on what to do. I think they turned out well and my friend loved them.
DanicaA
Wednesday, October 3, 2012
Technique Swap Pages
Here are the promised photos of my technique page for the technique swap I joined last month. So much work yet I still managed to keep it fun.
Here are smaller close ups of the actual technique:
Faux Patina
1 light neutral color ink pad
2 medium colored ink pads
1 dark colored ink pad
Embossing Folder of Choice
Very Vanilla or Whisper White Card Stock
Metallic colored Embossing powder
VersaMark ink
Big Shot, Heat Tool & Embossing Buddy
1. Lightly cover the front inside top of your Embossing Folder with the lightest color ink of choice, carefully place card stock in embossing folder and run through Big shot.
2. Lightly sponge the lightest of your medium colors over the embossed card stock, full coverage is not necessary. Repeat with the remaining medium color. You do want good coverage but some patches of no color or base color will add to the patina effect.
3. Sponge over the top with your dark color to bring out the embossed image and give your piece dimension.
4. Pat your embossing buddy over the top of your card stock to get rid of the excess ink. You want the piece to be dry so the embossing powder doesn't stick to the entire image.
5. Dab VersaMark randomly over the top, you can just use the pad direct to image.
6. Sprinkle your embossing powder over the top and heat to set.
7. You are now ready to use on your project.
I hope that this inspires you today to create something beautiful.
DanicaA
danderson@tikvahstreats.com
Tuesday, October 2, 2012
MDS Tuesday
Tuesday is the day Stampin' Up! introduces new downloads for My Digital Studio (MDS). I have really enjoyed putting together projects in MDS and have been working with it to create a new blog design. Although at the rate I am going it may be a while before it is completed. I did create my header using MDS and am hoping to continue to create some great projects to share in the near future.
Today I am sharing with you this weeks downloads, if you would like to see the full My Digital Studio Catalog visit this page and click the MDS Catalog link. The catalog will download in PDF format.
Here's today's new downloads:
To order any of these or other downloads visit my store
I hope you all have a wonderful day!
DanicaA
Saturday, September 15, 2012
Blooming with Kindness Patina
This month as you may already know, I have introduced my new stamp of the month club and I have decided that every once in a while during the month I will post projects created with the current months stamp set. Hopefully, I can do this at least once a week. I will be mixing the stamp sets up not always using only the current set on each project, but this will give you an idea of what you can do with this set.
So today I have two cards that I created, using the same technique on both, I used the Faux Patina technique which also happens to be the technique I used to create my technique swap. (How many times can you use technique in one short paragraph? I used it five times here.)
I really like the looks of these cards they are a bit on the Victorian side, which is a change for me. I am finding that as I spend time creating different projects my tastes in card style continues to develop and cards that originally were not my style I have come to enjoy. As you create and continue to do so over time your tastes may change or just grow to include other styles. Also, knowing how to create these other styles does help. When you are unsure of what you are doing it does make it harder to create something that you will enjoy or be proud of. The beauty of being handmade and homemade is that no one expects perfection, in design; they would not be handmade if they all come out the same. One way that can help you grow in your capabilities is to join some of the challenges you can find on these and many other blogs:
Be brave, feel free to experiment, I have found even the cards that I don’t consider to have turned out well, are well received and very much liked. Many times I end up giving my rejects (not quite to my liking) to my mom and she uses them and brings back compliments-this makes it very much worth the effort and makes those mistakes, okay. I am always more critical of my own efforts. I think if someone researched this, they would find that we all tend to critic ourselves in many ways worse than others would.
I hope you all enjoy!!
DanicaA
danderson@tikvahstreats.com
Project Supplies:
Stamp Sets: Blooming with Kindness
Card Stock: Rose Red, Very Vanilla, Watercolor paper
Inks: Crumb Cake, Regal Rose, Rose Red, Chocolate Chip, Basic Black, Versamark
Accessories: Big Shot, Labels Collection Framelits, Apothecary Accents Framelits, Fancy Fan Embossing Folder, Gold Embossing Powder, Antique Brads, Dimensionals, Essentials Paper Piercing Pack
Friday, September 7, 2012
Postage Due
This card was made using a stamp set that I just had to have
the moment I saw it in the new catalog. As a demonstrator we are able to place
orders from new catalogs (called Pre-Orders) before the catalog is released.
Now with the minis we can order any stamp set or even all of the stamp sets and
up to 3 of each consumable, but with the annual catalog they, being the home
office, choose which stamp sets and supplies we can purchase and we get to
choose from that list. All that being said, this set was not on the list, so
like everyone else I had to wait until after June 1st to place my
order.

This set was one of the first items on my order and I get my orders
pretty quickly usually within 4 business days and this includes the day of
order. So I ordered the set, was thrilled when it came and I did not even use
it until July when I went to craft camp and had almost 8 straight hours of play
time.
Play time- I thought I was to old for this stage in life and here I am looking
forward to it again. It is usually the only time I have to be as creative as I
would like and not feel as if I should be working on something else. I suppose
I could call it craft time, me time, creativity time, but play time works for
me.
I hope you all enjoy!
Have a great weekend!!!
DanicaA
Project Supplies:
Stamp Sets: Postage Due
Card Stock: Primrose Petals, Midnight Muse, Whisper White Card Stock,
Inks: Primrose Petals, Raspberry Ripple, Midnight Muse Stampin’ Write Markers & Classic Ink Pads, Black StazOn Ink pad
Accessories: Postage Stamp Punch, Sponge Daubers
Tuesday, September 4, 2012
French Foliage with Stamp Off Technique
I hope that Labor Day weekend was as smooth for you as mine
was. I was able to stay home, kick back and finish a project I have been
working on. I also put in an order for a few supplies I needed and received a
couple of other orders large enough to be their own workshops. Those are always
fun.
I have also been working on a technique swap I joined, I need 41 samples and as I don’t think I could have done them all identical I switched my colors up a bit on some. When I get them all finished I will share a photo of them before mailing them off. I want to have them in the mail by the end of the week, although I have until the beginning of October to finish.
Today’s project was a card I made using the French Foliage
and One in a Million stamp sets. I created this card for last month’s Stamp
Camp. I wanted something clean and simple, yet using plenty of color. I really
like the French Foliage set, it has versatility to it especially for use in fall or
vintage projects.
For the greeting I used the One in a Million set and on the inside just used the stamp in the set that says "that makes you one in a million!" you could make the inside a little fancier like I did on the inside of another of the same card. I took one of the leaf stamps from the french foliage inked it up and then stamped off on a piece of scrap paper to remove some of the ink. You may need to test this out a couple of times on scrap paper to see how light you want your image to appear. I then stamped my inside greeting over the top to add a little pizzazz to the card. Here is an example as to how I did this, I chose to stamp off two times as i like the look of the image a bit lighter than it would have been.
I hope you all enjoy!
DanicaA
Project Supplies: Whisper White Card Stock, French foliage & One in a Million Stamp Sets, More Mustard, Cajun Craze, Always Artichoke, Basic Black, Chocolate Chip Classic Ink Pads, Apothecary Accents Framelit, Big Shot, Wood grain Embossing Folder
Monday, September 3, 2012
Introducing...........
Visit my Stamp of the Month Club Page for more details!!!!
I love this months stamp set for its versatility. With the flower image and the multiple greetings this would definitely make a good starter stamp set. Although it is also a fine addition to my many other sets. I made up some sample cards that will be given out to all my club members.
Here is a preview of the cards you will receive when you purchase this months set.
I hope you all enjoy!
Danica A
My Stampin' Up! Website
danderson@tikvahstreats.com
Sunday, August 19, 2012
Black & White with a Hint of Color Swap
This is a card that I did for a swap last March. It was a black and white/vanilla with a splash of color swap. I really like how this card turned out, very elegant. While the stamp set is no longer available you can use any sentiment in it's place.
There are many layers of here, I started with a base of Basic Black added a layer of Very Vanilla and another layer of Basic Black. I used a piece of scrap paper to glue my different paper layers together so I could run it through the big shot with the top note die.
There is starting at the top very vanilla embossed with the vintage wallpaper embossing folder I used First edition DSP and silver glimmer paper that I colored with basic black ink, I used the scallop trim border punch on the top edge of both pieces. I added a piece of Basic Black embossed with the Houndstooth embossing folder. At the bottom I added another piece of the First Edition DSP. I then ran the layers through the big shot with the top note die added some Basic Black satin ribbon. The tag was created with the lots of tags die and the extra large oval punch, I embossed the saying with white embossing powder and glittered around the edge with red glitter and added a red brad to the center of my congrats stamp. Add a few pearls and the card is finished.
I hope you all enjoy!
DanicaA
Project Recipe: Basic Black, Very Vanilla Card stock, First Edition Designer Series Paper, Silver Glimmer Paper, Tagtastic Stamp Set, Basic Black and Versamark Ink, White Embossing Powder, Big Shot, Houndstooth & Vintage Wallpaper Embossing Folder, Top Note & Lots of Tags Dies, Extra Large Oval Punch, Basic Black Ribbon, Red Glitter, Real Red Brad
Monday, June 11, 2012
Update and New Catalog
Wow! It has been a while since I last blogged, and I am feeling very guilty. Life has been absolutely crazy busy for me lately, but I have to blog today. I am so excited about the new Stampin' Up! Catalog and today I received the Holiday Catalog and it blew me away.
If you haven't checked out the new catalog yet, Do So NOW!!! I was absolutely thrilled to see so many of the mini catalog stamp sets carry over, I think for the most part I had only purchased previously the ones that ended up carrying over. There are so many new stamp sets and I am having a hard time choosing which ones to get first. I am definitely going for Postage Due (w-126395, c-126397) on page 108 I also want the Morning Post Alphabet (w-126590, c-126592) and the Travel Journal builder wheel (126937) on the same page. Take a Ticket Wheel (126941)page 32, that coordinates with the Ticket Duo Punch (126883) page 182. More Framelits and coordinating stamp sets, Layered Labels (w-127070, c- 127072) page 103 coordinate with the Apothecary Accents Framelits (127003) page 191, Daydream Medallions (w-126465, c126467) page 117 coordinate with the Floral Frames Framelits (127012) page 191. A new butterfly set Papillon Potpourri (w-123757, c- 123759) page 115 and a matching punch Elegant butterfly (127526). I was disapointed when I saw that the butterfly sets and punch were on the retired list so I was very happy to see this set. I would definitely say this set is much more elegant. I love the Flowering Flourishes set (w-126365, c-126367) page 121. there are some lovely new background stamps Ex Libris (126600) page 128 & Pleasant Poppies (w-126480, c-129499) page 129. A lot of new greetings sets, I am not even sure where to start here as I could probably use almost all of them. New In Colors, Gumball green, Raspberry Ripple, Midnight Muse, Primrose Petals & Summer Starfruit. Some update to tools, a new larger sized Stampin' Scrub (126200) page 157, the heat tool has been re-done with 2 heat settings and a new sleek, slimmer design (129053) page 159, a new paper cutter (126889) page 180, I really think this will be better, it isn't available quite yet but it is on my list of must have as soon as it is available. lots of lovely new DSP I am loving the Natural Composition Specialty DSP (126917) page 162, and haven't decided on any favorites yet on the rest of the designer series paper.Some lovely new Simply Scrappin' kits, my favorite is the Razzleberry Splash (126930) page 168. New Fabrics page 170, Ribbons page 172, the Vintage Faceted Designer Buttons (127555) page 176, look like they would be a lot of fun to use. We have quite a few new embossing folders in a new larger size Fancy Fans (127751), Chevron Folder (127749), Argyle Folder (127750) page 189, there is a new set of folders to coordinate with a new edgelit Decorative Designs folders (127023)& Large Scallop Edgelits (127019) page 190. Another new edgelit set is the Finishing Touches set (127010) page 190. Also new dies, Delicate Doilies Sizzlits L (126999) page 191, Oval Accents Bigz Clear (127005), Typeset Alphabet Bigz (127553) page 192. Also coming in late 2012 is MDS 2, with updates and some cool new features.
There are so many new offerings that I think everyone will love. These are probaly all my top choices but there are so many things that if I keep going I will have to list the whole entire catalog and I would rather you go ahead and take a look. You can click the link at the left to see the catalog in PDF form or contact me to receive a catalog.
Okay long post today but I am really excited about this catalog year and am going to sit down and plan out some projects for the next while. So I hope to get back into the blogging mode and I may share some older projects for a little while so stay tuned.
I hope you all enjoy!
DanicaA
Thursday, May 3, 2012
Thank You Card
I made this card with the intent to use Elegant Eggplant Card Stock (as I have never used this color previously) and a background of my own making. I wanted to create my own pattern paper, although when I stamped my background I messed up the nice clean stamped image. Normally I would turn over the card stock and try again, but I decided I really do like the shadowed effect I got. It works very well on this card.
I find that I tend to use the same stamp sets constantly and end up forgetting about the others. I am hoping to pull out those rarely used sets and either use them or let them go. With the Retired list out I may just let go of some of the sets that, while I liked, didn't really use. This next year I will be a little more selective as I did an
inventory and found that of my current sets not counting mini catalog items, and I have 35 sets and 24 are retiring. I'd better choose wisely this year, although with so many new sets maybe less will retire next year. I won't count on that but it is a thought.
Check out the retired list, and be sure to order your favorites before they are gone.
I hope you all enjoy!
DanicaA
Project Recipe: Card Stock: Elegant Eggplant, Night of Navy, Perfect Plum, Whisper White
Ink: Basic Black, Elegant Eggplant
Stamps: En Francais, Bella Toile, Elegant Thank You
Dies: Adorning Accents Edglits, Lots of Tags
Accessories: Big Shot, Extra Large Oval Punch, 5/8" Organza Ribbon
Tuesday, February 28, 2012
Quilted Top Note Purse

Well today's post has been sitting here on my desk waiting for me to finish the project and then type up. I have finally gotten to it, after almost a week. Life has been a bit busy lately.
My inspiration for today's project came from a fellow Demonstrator on Stampin' Connection, Michelle Yager. Stampin Connection is a site for demonstrators to share projects, ideas and discuss all things Stampin' Up! I really liked the look of her quilted top notes, so I thought I would give it a try. Here is my finished project.
I used the top note bigz die to create my front and back with card stock & chipboard. Two pieces of card stock and one piece of chipboard for each. on the two of the four pieces of card stock. To create the quilt I used my 1-1/4" square punch to punch out my designers series paper and then glued to a scrap piece of card stock. I then ran it through the big shot with my top note die and then trimmed around the edge at the scored line, this then allowed me to glue this piece as an insert on my front piece of Lucky Limeade card stock. I then repeated this step for the back of my purse. I added a box that I sized to the top note and made out of matching CS, I added the ribbon to the sides and then attached a brad to each side to cover up my ribbon holes.
Decorate the front how ever you wish and add some chocolate or pens & pencils and you have a cute little purse to give as a gift.
I hope you all enjoy!
DanicaA
Project Recipe: Lucky Limeade & Whisper White Card Stock, (SAB) Everyday Enchantment Designers Series Paper, Oval All Stamp Set, Basic Black Ink, Big Shot, Top Note & Beautiful Butterflies Bigz Dies,Lots of Tags Sizzlits Die, 1-1/4Square & Extra Large Oval Punch, (SAB) Calypso Coral Organdy Ribbon & Everyday Enchantment Brads
Subscribe to:
Posts (Atom)